In this tutorial, we are going to explain about How to make Changes in Video Player Settings and Video Streaming Website Settings
By default, we are on Flicknexs Home page. Click on the top right corner of the home page menu -> then click Admin section.
You are directed to Admin page
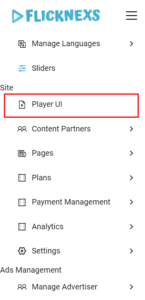
To make changes in Video Player
In Menu -> Site ->Player UI option
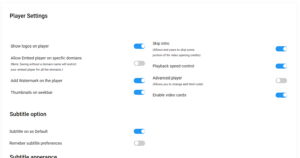
Player Settings Page appears on the screen and you have to customize the video player according to options available
You can show the logo on the player by clicking on the button
You can add skip intro button to have that option during the beginning of the video by clicking on the button
You can add subtitles as a default option where subtitles appear on the screen when the video is played
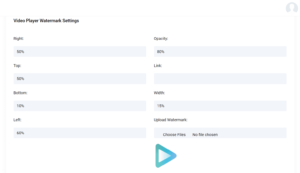
By further scrolling down the page, you can watermark video player under video player watermark settings
Finally, click on Save button on the bottom left of the page
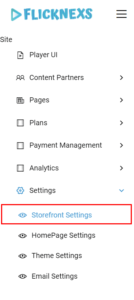
To make changes to Video Streaming Website
In Menu -> Site Section->Settings Option -> Storefront Settings
Site Settings page appears on the Screen
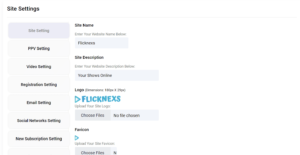
You can type in name of your site under Site Name text box
You can add a description of the site under Site Description Text box
You can add logo and Favicon by clicking choose file button
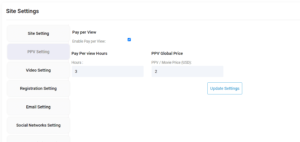
Moving onto other section PPV settings
you can fix PPV pricing based on hour
Coming to the next section Video Setting
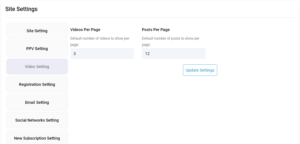
You have the option to type in the number of videos and posts to be displayed per page. Click on Update Settings Button
In the next section – Registration Setting
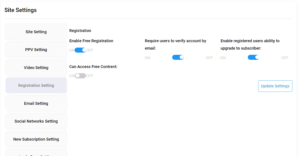
In this section, you can enable/ disable free registration, email verification and can give access to free content
Click on Update Settings Button
In Email Setting Section
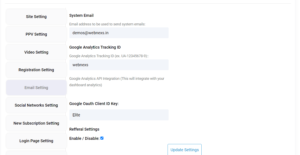
you have the option to add email information and google analytics tracking id.
With this system mail address, you can send emails to users regarding your video streaming platforms like new movie releases and feature updates.
In Social network Setting Section
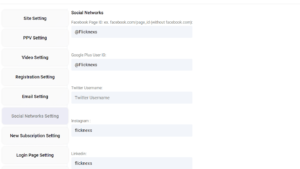
In this section, you can social media page link of the website.
Different social media platforms include Facebook, Instagram, Twitter, Linkedin, Skype, Google Plus and Whatsapp.
In New Subscription Setting Section
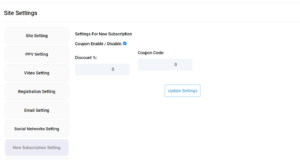
You have the option to enable or disable coupon and referral settings. You can type in the coupon code Coupon code text box and discount percentage in discount text box.
By scrolling down the page, Login page setting section
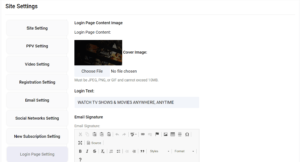

you have the option to add login page information like login text and cover image, pusher notification, and email signature.
You can add Notification icon by clicking on Choose File button
In Advertisement Setting Section
In this section, you have the enable option to show ads in between the video and other options related to advertisements

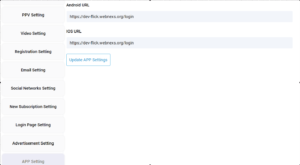
In the next section, App Setting
You can add Android and IOS URLs in the text box
Click on Update Settings Button
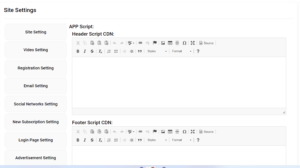
In Script Setting Section,
In this section, you can insert code into the header and footer section of the website by pasting codes on Header script CDN and Footer Script CDN to call codes inside header tags and footer tags.
In the final section, Default image setting
In this section, you can add a default image for the site
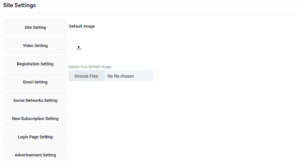
Finally, Click on Update Settings button at the bottom right corner of the page to save the changes.
To make changes in Home Page
In Menu -> Site Section->Settings option -> Home Page settings
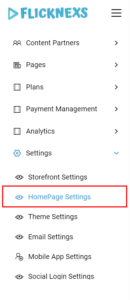
Home page settings appear on the screen
There are different sections on the home page: Featured video, Latest video, Category video, Live videos, audios, albums, and Series.
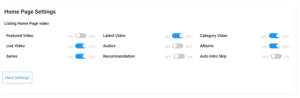
You can enable them or disable them by clicking on the radio button
Finally, click on Save settings button
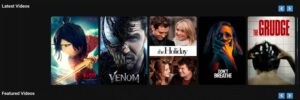
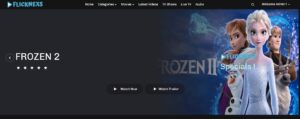
Given below are two images of the home page when the latest video section and featured video section are added

To Select Themes for Website
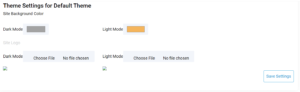
In Menu -> Site Section->Settings option -> Theme settings
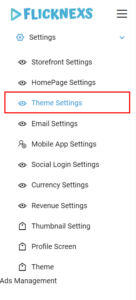
Theme Setting page appears on the screen
There are two modes available Dark mode and Light Mode
Select Site logo for both Dark mode and light mode by clicking on Choose File button
Finally click on Save Settings Button
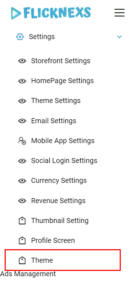
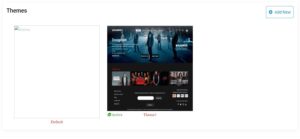
Theme Section
In Menu -> Site Section->Settings option -> Theme
In this section, you choose the theme for the website from available theme templates
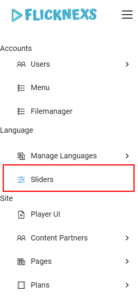
To Add or Delete Sliders to the home page
In Menu -> Language section -> Sliders Option
Sliders Page appears on the screen
You can add sliders by clicking on Add New Button
You can edit or delete sliders by clicking on the respective button under Operation section
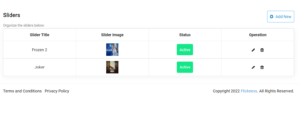
This is how Sliders appears on the home page screen
Do you need any help or have questions about this video player and video streaming website settings tutorial? Please contact us.
Not yet a Flicknexs user, and are you interested in trying a free trial for 7 days? Sign up today to get started.
Leave a Reply