Webnexs Project Process:
In every organization, they will be having some measures and process delivery projects will be given by the clients. Webnexs has been constantly paying attention with on delivering solutions in quick time. We are certainly following some steps which are significant towards accomplishing the goals.
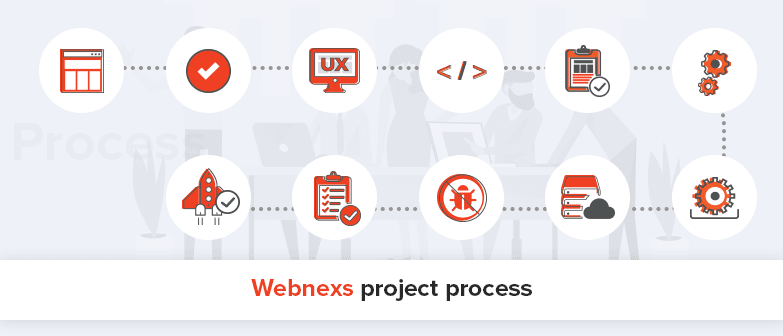
Project Process Steps:
Before starting the project process, the most important thing is to “Understand the business ideas”. The Project Process in webnexs is given below:
They are,
- Design Wireframes
- The Approval
- Designing(UI) based on the UX defined in Wireframes
- Coding them to the Core of the technology(HTML)
- Technical Wireframe Documentation
- Technology Development
- Core Integration with any technology
- Testing on Demo Server
- Fixing bugs on the functionality
- Review of test fixes in Demo server
- Approved : Deployment to live
Understanding the Business Ideas:
Understanding the business ideas is the most primary thing that must be examined first before starting the project process. The innermost element of the business vibrates which to formulate it as a huge marketplace like Amazon, Flipkart etc., within two years. Lashing down from this logic and linking the current situation where we are now – we are suggesting a bottom-up approach that could unite both the ends equally, by scaling up technology with innovative combination as time grows.
Now- In the recent days, we will contain a business project from where you will be testing with 10 materials to start with. A business project is very well linked with a blogging platform, this is the place where the appearance of your business ideas taken through the contents that will take place and applicable ideas to join the contents to a business project that will lay top so, the product page will open up whenever someone reads the blog and Clicks the links that are fixed for a related product, initializing a conversion.
1) Design Wireframes (User Experience UX):
Wire framing is a skeletal two-dimensional model; it is a process to design a website in a structural way. It is normally used to outline the content and functionality of a page that takes to describe user’s needs and wants. It is used before the page visual design and contents are added, it shows the basic structure of the page.
On designing wireframes UX has to be done in the following areas:
- The entry of the website – The entry of the website describes you “The Home Page”, which is the introduction page of the website.
- The Catalogue Page – “The Catalogue Page” is the page which Showcases the all of our products and describes it.
- Individual Product Page – “Individual Product Page” is the page which describes that one specific product detail, customer reviews, the price of that product, ordering features, then other related information’s about a product to be positioned here.
- Checkout Page, Cart Page – “Checkout page” is the page which shows to a customer on the time of step-by-step checkout process. “Cart Page” is the page that shows the products that are selected by the customers for their purchases.
- About us, Terms, Policies, and Other CMS pages – “About us page, Terms, Policies and other CMS pages” are all available to describe that particular websites details.
- User Dashboard Flows – A dashboard is a UI that resembles and presents information by the method that is simple to read.
- Sign in and signup Pages – “Sign in” Page is the page that is used for creating a new account and “Sign up” page is about opening an account which is created already.
The final user experiences must have to be skilled here and we have to move ahead to other stages, once it’s done. This is the stage which leads to our success in the user operating the website effortlessly.
2) The Approval:
Once, the wireframes are designed (User Experience UX), the design will be sent to the clients and the client will be reviewing the wireframes. If the client is satisfied with that design, then the process will be moved to the next step. In case, of dissatisfaction, the clients will be sending us some corrections in that wireframe design. Then, the design will be customized according to the client’s needs. If the Clients are satisfied will the Re-design, they will be giving approval.
3) Designing(UI) based on the UX defined in Wireframes:
Once, the client approved the wireframe design, the next step in the process is all about Design engineering the wireframes, this Design Led engineering of wireframes will undoubtedly lead to revenue, though it is costing at present, in the long run.
4) Coding them to the Core of the technology(HTML):
After getting the wireframe design model, the next step in the project process is to code the wireframe design using the core of the technology (HTML). The developers will be coding the Front-End using HTML for the client’s customized wireframe designs.
5) Technical Wireframe Documentation:
Many clients will get confused when they see the wireframes for the first time. They won’t get a clear idea that what is this wireframe design website is all about. So, it is very important to explain and present them documentation in advance about what they will be seeing on the website. To make the clients clear, technical wireframe documentation is given for the clients. This documentation will provide detailed information about,
- The varieties of content that symbolize on the page.
- The main concern, arrangements and the common size of the content blocks.
- The series of functions showed.
- How the outlines will be changing based on mobile and desktop views.
6) Technology Development:
The next step, in this process, is “Technology Development” i.e., the clients will be informing us that which technology is needed for them. For example, PrestaShop, PHP, or any other technology they want. The developers will be developing the technology for the client’s websites Back-End process.
7) Core Integration with any technology:
The seventh step is Integration of design to core E-commerce and defining E-commerce, that is integrating both the Front-End and Back-End process together with any technology such as Zend Engine/ Core PHP or Magento, PrestaShop or any framework that client wishes for.
The time, when we are completing the design engineering, we are going further on to the project integration with the designing. For, example it is something like fitting the car engine inside the body of the car, which shows the car will run only when we combine the engine inside the body of the car.
8) Testing on Demo Server:
In this process, the codes will be arranged from the local machine to the demo server to visualize for you and to check out how the front-office and back-office functioning. Based on the conclusion from Google Analytics data’s, testing with 16 dissimilar Desktop and Mobile responsive Front-End screens to verify the user experience on the demo server. Each and Every functionality will be unit tested for its actions. When the process is tested and it is all okay, then we are fine to go live. But, our live server arrangements will be experienced out here.
9) Fixing Bugs in the Functionality:
The next step in this process is Fixing Bugs on the functionality, after testing on demo server, the demo will be sent to the clients and they will let us know what logical errors for the functionality mentioned in the original signed Scope document. Based on client’s needs and wants, the Bugs will be fixed and carried out on basis of functionality. Then, a unit test which is done both manual and automated.
10) Review of the test fixes at demo server:
Following the above process, next one is to review of the test fixes at demo server which means testing the demo once again after fixing the Bugs on its functionality. This also includes hardening of the server, optimizing the performances which will be taking place here. Care will be given so we can have a frictionless server.
11) Approved: Deployment to live
The last process is that Approved: the website is a move to production on client server that is deployed to live. After the approval from the client, the code from the demo will be moved to live.
The sum of these phases will comprise the phase1. The main business project is offered as an attachment for your reference. And leading to the next phases, we will look in advance to move with
- Automation of E-mail.
- Live following of users pain points through videos.
- For Smoother delivery of contents, CDN is set up.
For further information’s about the project process or in case of any doubts then, don’t hesitate to contact us.

Leave a Reply